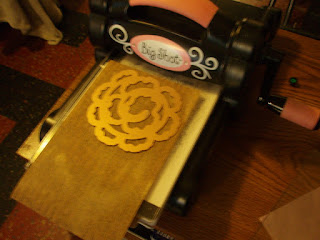
Anyway....I have been absolutely going crazy for this lovely flower die from Spellbinders, and when you add it with other lovely things...the end result is really pretty, and so I wanted to show you what I did, and how I did it!
First...and probably most important are the supplies!!! You will need: A piece of Tim Holtz Kraft Glassine paper (this comes in a pad of 36 sheets already cut to the proper size) and the Spiral Blossom 1 die from Spellbinders.
Next, you will also need a background stamp (mine is an old French Script stamp that I have from my old Stampin' Up days), some archival ink from Ranger (I used black, but the coffee color would also work) You probably could also use Stazon Ink instead, if that is all you have...but I happen to LOVE the Archival Ink...it stamps beautifully on everything! Last but certainly not least, one or two colors of Perfect Pearls from Ranger, (or any other brand of mica powders) The colors I used are Heirloom Gold and Cappuccino. You can use either a fluffy brush to apply them OR just your fingers....
Ok,,,,step one -
Ink up your background stamp with your oil based ink, and cover the piece of Kraft Glassine completely.
After you have stamped the paper (and this is important) you will need to heat set the ink onto the paper with your embossing gun. The Glassine paper has a wax like finish, and when you apply the heat you will notice that the paper takes on a "wet look" ...this is what you want. The paper returns to it's original look after it cools down. If you don't see the "wet look" on your glassine paper, your ink is NOT YET HEAT SET - it will smear, so make sure to hold your tool over the paper until it looks darker and wet.
Next, open your Perfect Pearls, and with a brush, OR with your finger (I used both) apply the mica powder randomly over your paper. You don't want to totally cover your paper with the mica - just here and there to give it a pretty metallic shine!
Again, after you have applied the mica, you must once again heat set the Perfect Pearls with a heat gun. Those of you who have used Perfect Pearls before know that there is a binder in these mica powders that is activated with a spritz of water. Well, because of the wax-like nature of the glassine paper, you do not need to spritz the Perfect Pearls with water. When you heat set the paper (again, as before - make sure you see the "wet look") your Perfect Pearls are totally set and will not rub off.,
Now take your Spiral Blossom 1 die from Spellbinders, and with your die cutting machine (pretty much any will work - I used a Big Shot, but I could have also used a Cuttlebug) cut out your flowers. You will be able to cut out two flowers from each sheet of the glassine paper. If you want to emboss the dies you can...but for this, I didn't....
Since you want to see the stamped image of your flower, when you pick it up, make sure that the stamped side is UP. Now you need to start rolling! You don't have to use anything, but I find it easier to use the handle of a thin paint brush or maybe even a quilling tool. begin rolling the flower, design in...
Once you get it going, you can take it off the paint brush and just continue rolling. Make sure that the bottom portion stays even as you roll..


No comments:
Post a Comment